Step 1
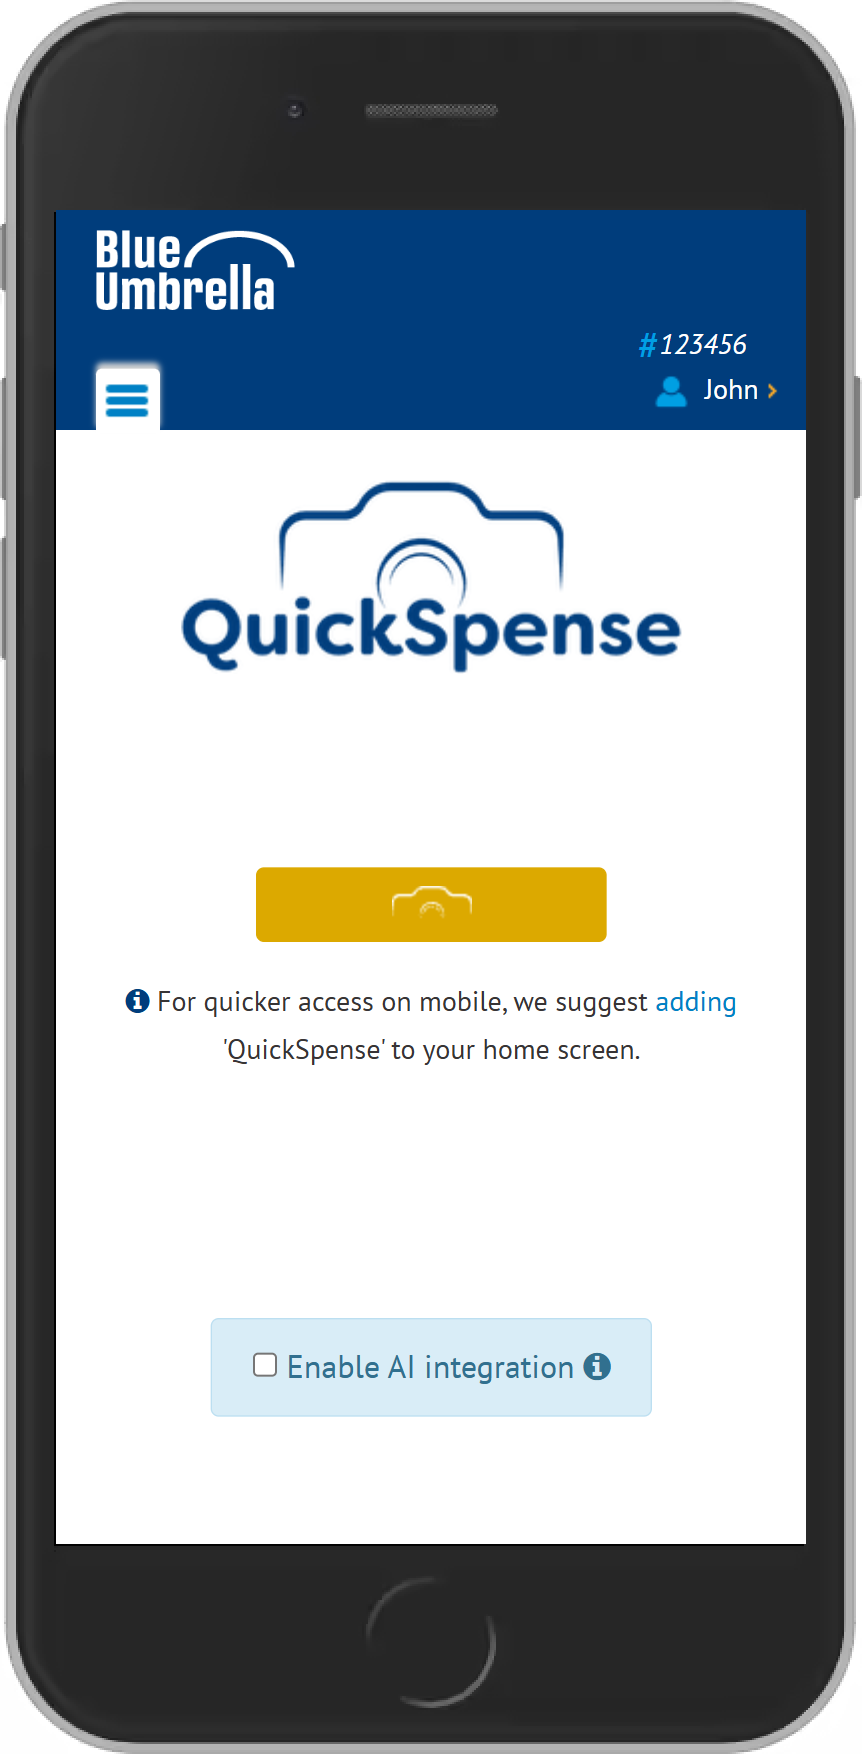
Login to your MyBlue Business page from your mobile browser, press the "camera" icon in yellow to upload a new invoice and tick the bottom box to enable AI integration.
Step 2
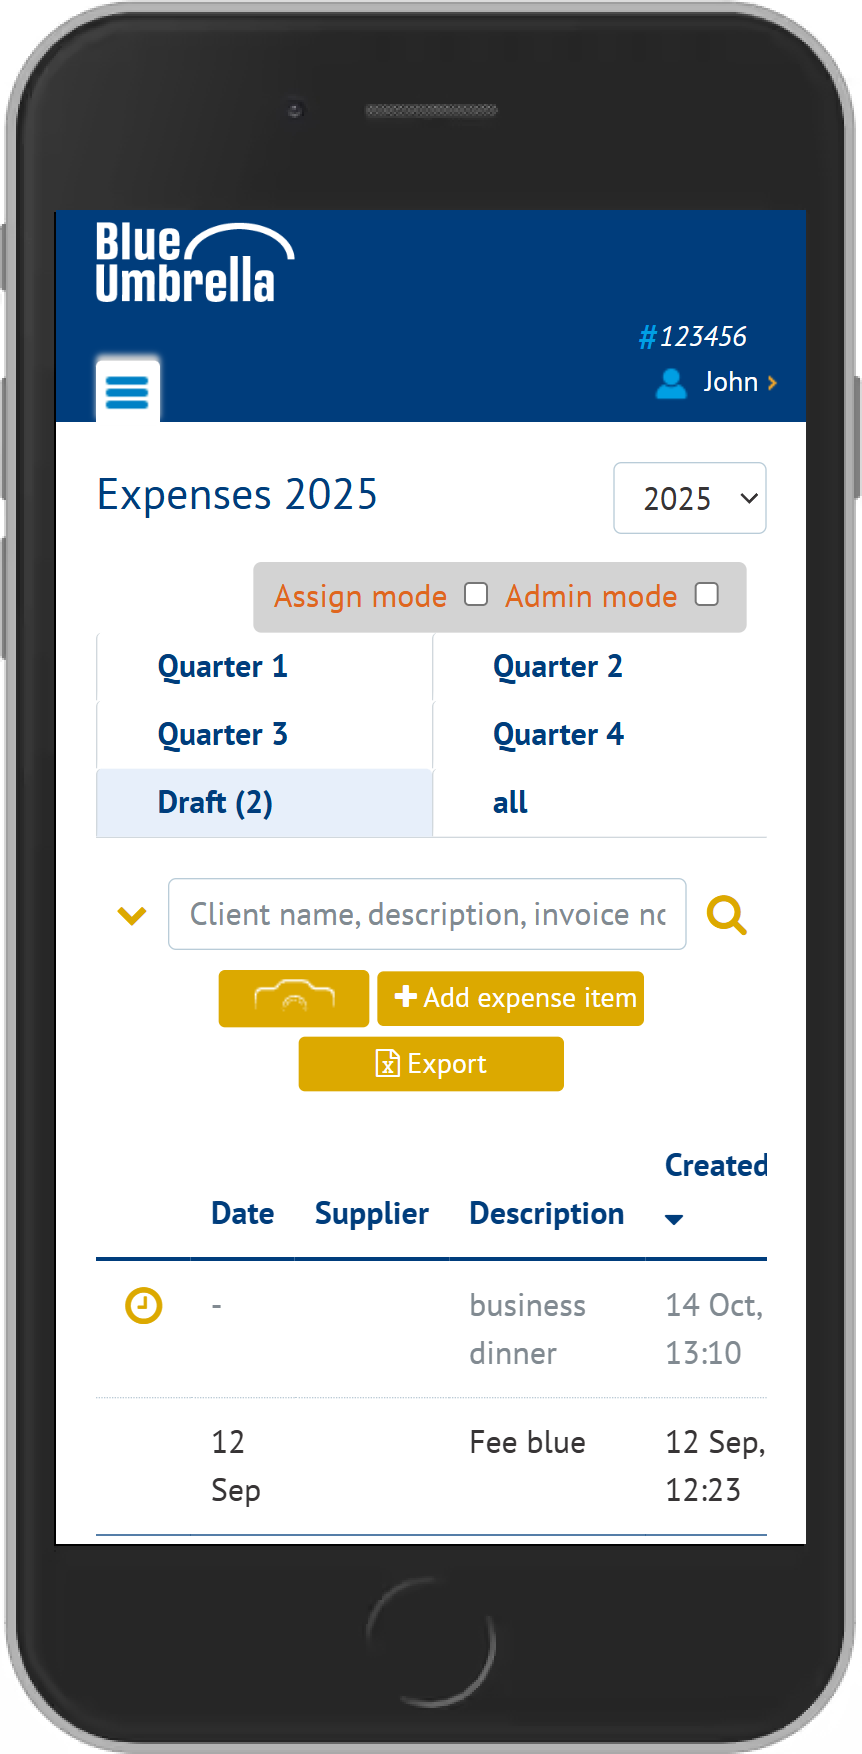
Upload and expense with the enabled AI tool and see a timer icon, which indicates that the invoice is being processed, it takes a few minutes.
Step 3
While the invoice is being processed by the AI tool, you can access the invoice details and see a message saying you are unable to edit it while it's being processed. You can override that by clicking on the icon "here" to manually fill in the information instead.

Step 4
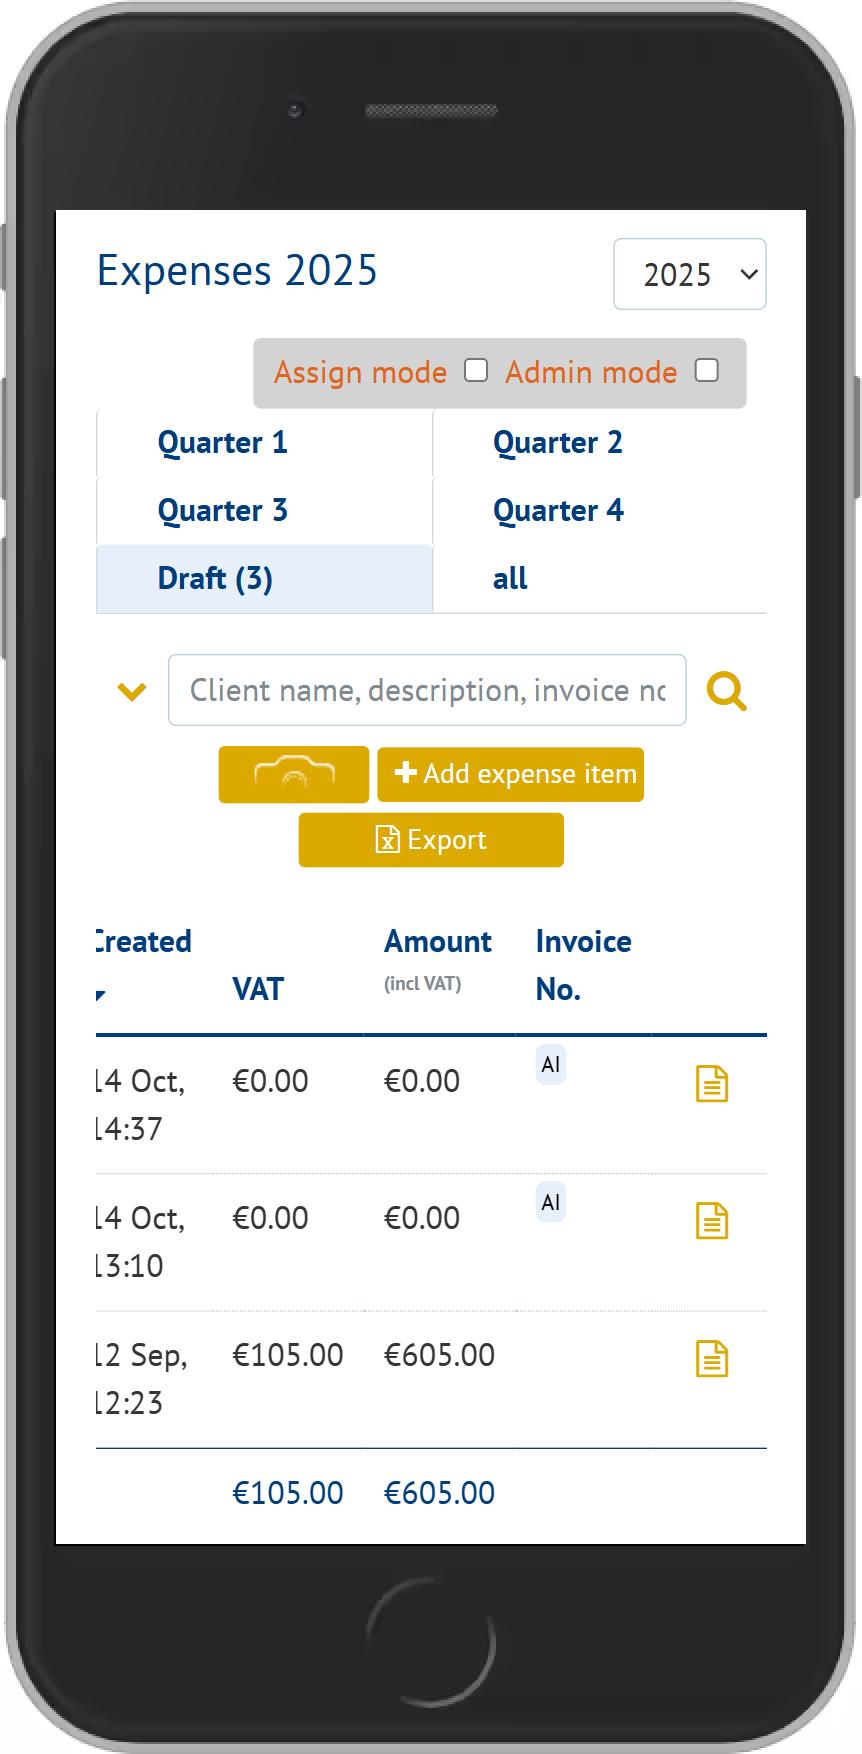
Once the information is processed by the AI tool, you will find an AI icon under "Invoice No.".
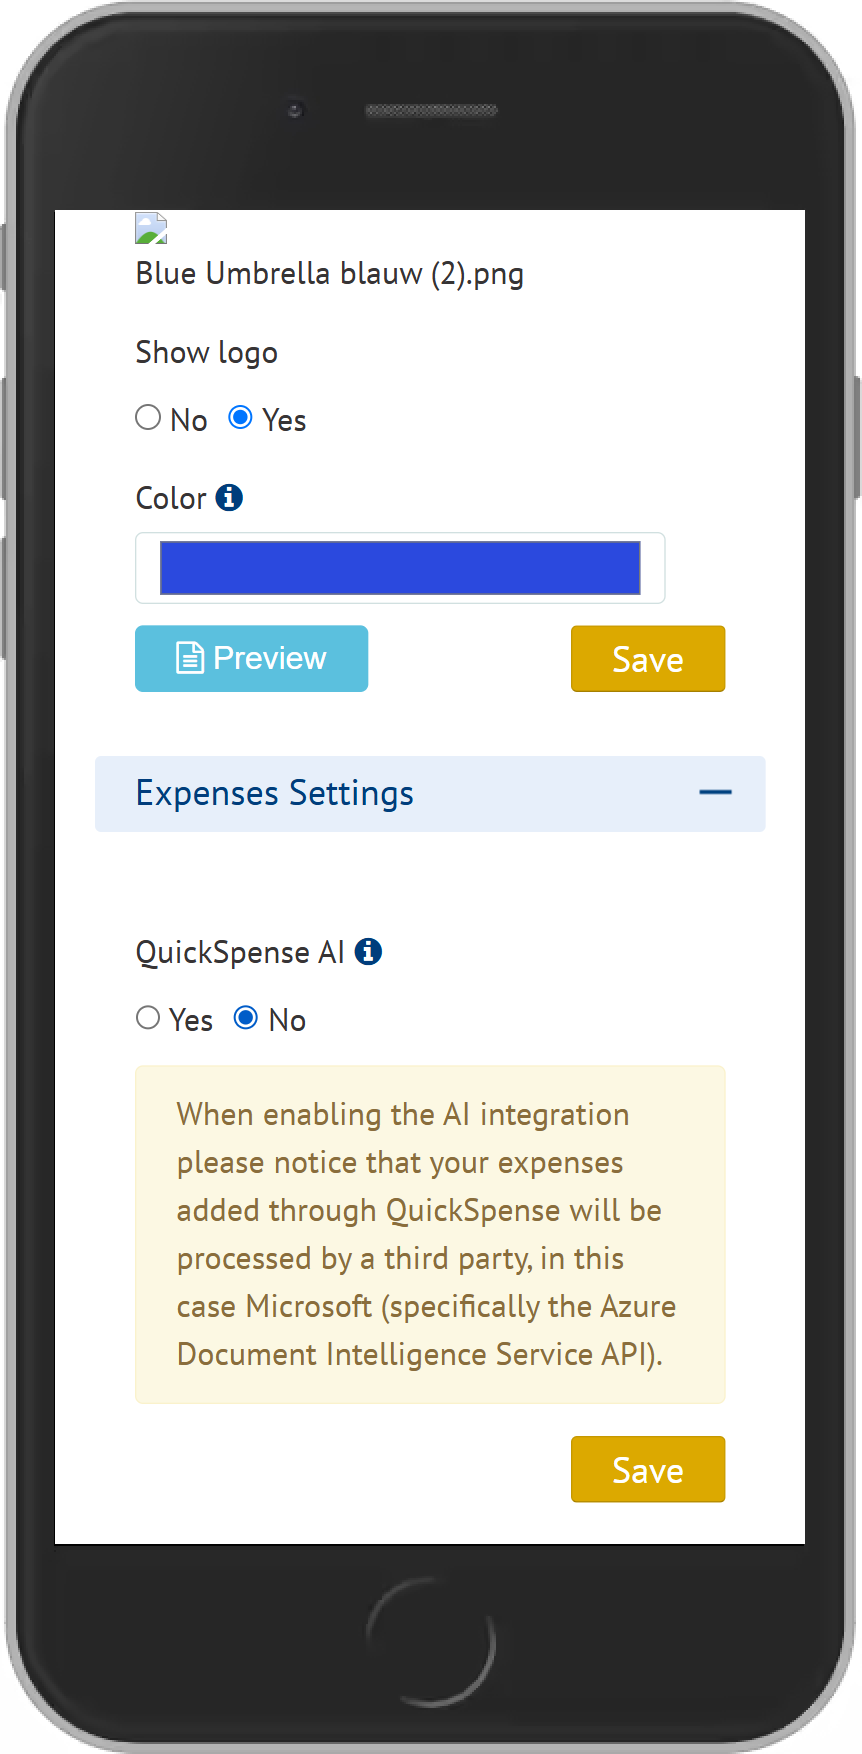
Step 5
To disable the AI integration tool, click on your company profile > go to settings > scroll down to expenses settings > select 'yes' or 'no' to using the AI tool.